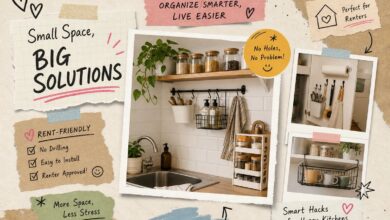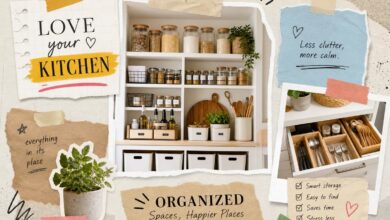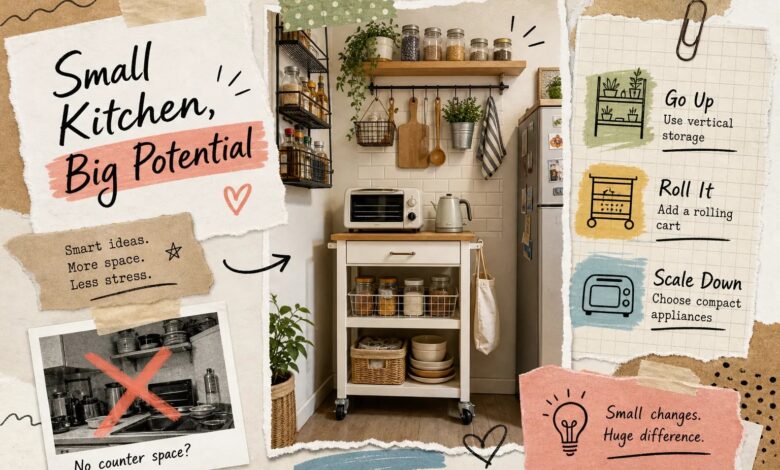
If you’re wondering how to organize a tiny kitchen with no counter space, you’re not alone. Picture this: you’re standing in your kitchen, holding a cutting board, and there is nowhere to put it. The coffee maker owns one corner, a slow cooker you use twice a year guards the other, and the three inches between the sink and the stove technically exist but can’t fit anything useful. It’s a frequent complaint in reader mail at NestKitchenMeals, and the good news is that fixing it doesn’t require a renovation, a bigger apartment, or spending a lot of money. For more on this, see our recipes guide.
The real problem in most tiny kitchens isn’t the size of the kitchen, it’s that the available space is being used wrong. Counter space disappears to single-use appliances, cabinet interiors get half-utilized, and the walls and doors that could be storing things are completely bare. This guide works through a prioritized, renter-friendly approach to reclaiming every usable inch, covering temporary prep surfaces, vertical storage, cabinet organizers, and smarter appliance choices. Most solutions here are removable and renter-friendly; a handful, like higher-quality rolling carts or pull-out shelf inserts, may involve a modest upfront cost or a bit more installation time, but all of them can realistically be tackled in a weekend. If you want to go further, how to organize your kitchen like a chef: 7 pro habits covers it in detail.
Start with the sink: your fastest source of extra prep room
Most people stare at a tiny kitchen and immediately think they need to buy furniture. The faster fix is already built into the room. Your kitchen sink sits empty during most of prep time, and an over-sink cutting board converts that dead space into a legitimate second prep surface, one of the best small kitchen storage ideas that costs almost nothing to implement. You’re looking at $30 to $50, no tools, and no moving anything around.
Why over-sink boards work so well when you’re trying to organize a tiny kitchen with no counter space
An over-sink board bridges the basin so you’re prepping directly above the sink, which also means vegetable scraps and rinse water go straight down the drain. For small apartment sinks, look for expandable models that stretch from roughly 22 to 34 inches wide, like bamboo boards that sit around 11.5 inches deep front-to-back. If your sink is especially compact, a fixed board in the 11-by-17-inch range can still give you a meaningful work surface. The key measurement rule: the board should rest with at least one inch of overhang on each side of the rim for stability.
These boards handle food prep loads well, but they’re not designed to hold appliances or heavy pots. Use them for chopping, staging ingredients, and draining washed produce. Many models hold up for years with normal use; bamboo and thicker composite boards tend to be the most durable, though longevity will vary depending on how often you use them and how well you maintain them.
How to measure your sink before buying
Before ordering, take three measurements: the inside width of the sink opening, the front-to-back rim depth, and the clearance available on each side for overhang. Also measure the distance from the back rim to the base of your faucet, because some boards will sit too far back and hit the faucet. Two minutes with a tape measure saves you from a return trip.
When a fold-down shelf is the better move
Some sinks are too small, too deep, or too oddly shaped for a standard over-sink board. In that case, a wall-mounted fold-down shelf is the close alternative. These mount flush against the wall when not in use and flip out to create a prep shelf when you need it. Renter-friendly versions with adhesive or over-cabinet-door mounting exist, so you don’t need to drill a single hole to get one installed.
Roll in a portable cart and take your prep space with you
A rolling cart is one of the highest-impact purchases you can make for a tiny kitchen because it adds both prep surface and storage in one footprint, and it can move out of the way when it’s not needed. The key is buying one that’s actually sized for a compact space rather than a standard kitchen.
What to look for in a compact rolling cart
The smallest footprint options on the market sit around 12 inches deep by 16 inches wide, which is narrow enough to tuck beside a refrigerator or at the end of a counter run. Look for locking casters: a cart that slides away from you while you’re chopping is useless as a prep surface. Weight capacity matters more than most buyers realize. Aim for at least 88 pounds on the prep surface so the cart handles a cutting board, a mixing bowl, and a pot without flexing. Models with open shelves underneath are especially useful because they replace cabinet storage at the same time they add counter space.
Drop-leaf carts vs. open-shelf utility carts
Drop-leaf portable islands have hinged leaves that fold down flat against the cart when it’s pushed against a wall, then extend outward when you need a larger prep surface. These work well in kitchens where the walkway is tight and the cart has to sit flush against something most of the day. Open-shelf utility carts have a fixed prep surface that’s always available, but the footprint doesn’t change. If you need the storage tiers more than you need a larger prep surface, an open-shelf cart is the simpler, sturdier choice. If you want to go further, meal prep covers it in detail.
Where to position a cart for maximum usefulness
A cart doesn’t have to live inside the kitchen at all. Pushed into a hallway just outside the kitchen door, or parked at the edge of a dining area, it effectively extends the kitchen’s footprint for prep time and rolls back out of the way for everything else. The whole point of a cart is mobility: pull it to where you’re working, lock the casters, prep, then move it. Treating your cart as a piece of furniture that belongs in one fixed spot wastes what makes it useful.
How to organize a tiny kitchen with no counter space: put your walls and doors to work
In a tiny kitchen, every flat vertical surface is potential storage. Many renters underutilize walls and cabinet doors, which means dozens of square feet of free storage go unused every day. No-drill systems can hold real weight, but their performance depends on the mounting method and your wall surface. Tension systems and magnetic mounts can support substantially more weight than adhesive mounts, and adhesives often fail on textured, dusty, or humid surfaces, something worth knowing before you decide what to hang where.
Adhesive rails, hook strips, and magnetic knife bars
Adhesive rail systems are good for lightweight items: utensils, small tools, measuring spoons, and anything under three to four pounds per hook. They need a smooth, clean surface to hold reliably, and the most common failure point is installing them on slightly dusty or textured walls. Magnetic knife strips are a more reliable choice for metal tools specifically, since the hold doesn’t depend on adhesive quality and they can be mounted with a single small screw or strong adhesive backing on smooth tile. Keep the rule simple: adhesive rail for anything light, magnetic or mechanical mounting for anything that could hurt if it fell.
Tension-rod shelving and over-the-door organizers
Tension-rod shelf systems rely on pressure between two surfaces rather than adhesive, which makes them the most dependable no-drill option when you need to hold real weight. Some tension systems are rated for 30 to 66 pounds, far more than any adhesive shelf can safely manage in a warm, humid kitchen environment. Over-the-door organizers are one of the most underused no-counter kitchen solutions in small apartments: they work on pantry doors, cabinet doors, and even the side of a refrigerator, and they’re ideal for spices, small bottles, foil and wrap rolls, and cleaning supplies that would otherwise take up counter space.
Removable pegboards for customizable tool storage
A small pegboard section on one kitchen wall can consolidate a knife block, utensil holder, pot-lid rack, and spice rail into a single vertical zone. Renter-friendly pegboard kits with adhesive or tension mounting exist specifically for this use case. Keep the load light: hooks and lightweight utensils work perfectly, but a pegboard mounted with adhesive isn’t the place to hang cast iron pans.
Unlock the space you’re already ignoring inside your cabinets
Most small kitchens waste a surprising amount of the cabinet space they already have. Vertical clearance inside cabinets often goes unused, and the back of any deep cabinet becomes a graveyard for things that are technically stored but practically inaccessible. The right organizers can effectively double what you can reach without adding a single cabinet.
Pull-out shelves for deep cabinets where things disappear
The problem with deep lower cabinets is that anything pushed to the back is functionally invisible. Pull-out shelf inserts slide forward on tracks, bringing the entire depth of the cabinet to you. In practice, pull-out shelf inserts can recover 20 to 50 percent of usable volume in deep cabinets, depending on how poorly the original space was being used. This is the single biggest usable-space gain available for deep lower cabinets, and it also eliminates the habit of keeping frequently needed items on the counter just because reaching for them in a cabinet is too much work.
Tiered shelf inserts and vertical plate racks for shallow cabinets
Shallow upper cabinets benefit most from creating a second level inside the existing height. Tiered shelf inserts add a raised shelf above the first layer so two rows of items fit where one did before, using height that was previously just empty air. Vertical plate racks stand dishes on their edges rather than stacking them flat, which makes individual plates easier to grab and creates usable space in the same footprint for bowls or containers.
Pan dividers and drawer organizers to stop the stack-and-dig cycle
Pan dividers prevent the avalanche of nesting cookware that buries the pan you need at the bottom of the stack. Simple drawer inserts, whether a basic cutlery tray or adjustable compartment dividers, keep the most-used tools visible and reachable. Once the drawer is organized, there’s no longer a reason to keep a spatula or set of tongs sitting on the counter “for easy access.”
Downsize your appliances and reclaim real counter space for good
This is where the biggest permanent gains happen. Each single-use appliance parked on your counter claims meaningful real estate on its own. If four of them are lined up before you start cooking, your kitchen’s entire prep surface has already been claimed. The fix isn’t fewer cooking tools, it’s choosing multi-function tools that do the same jobs in one footprint. For more on this, see our cooking tips guide.
How single-use appliances quietly take over small kitchens
A toaster, a slow cooker, a rice cooker, and a standalone air fryer each claim meaningful counter real estate on their own. A standard toaster, for example, typically has an 11-by-6-inch footprint; a standalone rice cooker often runs 10 by 10 inches. Together, four single-use appliances can easily consume the entire counter of a tiny kitchen before a single vegetable has been chopped. This happens gradually: each appliance gets added for a good reason, and nobody ever takes inventory of what the collection costs in total square footage until the kitchen feels unworkable.
The two swaps that make the biggest difference
Two appliance replacements make a measurable impact on counter space. First, a compact multi-cooker like the Instant Pot Duo Mini, roughly 11.5 inches tall and 10 inches wide, replaces a pressure cooker, slow cooker, rice cooker, steamer, and sauté pan in one unit. Second, a toaster-oven-air-fryer combo like the Cuisinart TOA-60 sits at a 15.5-by-16-inch footprint. It replaces a standalone toaster, a small oven, and a separate air fryer in one unit. Some models, like the Ninja Foodi flip-up design, are built specifically so the oven flips upright against the wall when not in use, recovering about half the counter space the appliance would otherwise occupy.
Finding the right compact appliance for your kitchen size
Before buying, check the compact appliance buying guides on NestKitchenMeals, particularly the roundup of small air fryers for compact kitchens. The difference between a two-quart and a four-quart model is often the difference between an appliance that fits your counter and one that takes it over. Those guides focus on actual counter footprint dimensions and what each appliance replaces, rather than maximum cooking capacity, a more useful framing when counter space is the limiting constraint. Related reading: kitchen counter decor ideas: 8 simple ways to style your space. For more on this, see our kitchen decor guide.
A simple priority order so you don’t do this all at once
Five categories of solutions can feel like a lot to take on at once. The readers who actually improve their kitchens are the ones who pick a starting point and execute it this week, not the ones who spend three weekends planning. Here’s how to sequence the work so you get results fast and build from there.
Start here: the three moves that make the fastest difference
These three actions require no tools, no wall damage, and can be completed within a few days:
- Measure your sink and order an over-sink cutting board or fold-down worktop extender this week.
- Audit the counter for single-use appliances and identify the first one to replace with a multi-function model.
- Install one over-the-door organizer on the most-used cabinet door for spices, wraps, or small bottles.
Each of these moves is independent, so you don’t need to plan all three at once. Start with whichever one addresses your most immediate frustration.
Build on it: cabinet organizers and wall storage as a second phase
Cabinet organizers and wall rail systems take slightly more planning because you need to measure cabinet interiors and assess what surface your walls offer for adhesive products. The payoff, though, is long-term. A tiered shelf insert in one upper cabinet, a pull-out shelf in your deepest lower cabinet, and a magnetic strip for knives and scissors will collectively clear the counter of items that were sitting there only because there was nowhere else logical to store them. Once those items have a home inside the cabinets, the counter becomes a workspace again instead of a staging area.
A kitchen without counter space is a kitchen waiting to be organized
Knowing how to organize a tiny kitchen with no counter space is mostly about sequence and the right tools, not square footage. A tiny kitchen isn’t a broken kitchen; it’s an unoptimized one. Many of the fixes on this list are portable and renter-friendly, with items like adhesive hooks, over-sink boards, and over-the-door organizers commonly available for under $50. Rolling carts and pull-out shelf inserts tend to cost more, but they also deliver the biggest long-term gains. Start with the over-sink cutting board and one appliance swap. Those two moves alone will change how the kitchen feels to work in. Then layer in vertical storage and cabinet organizers as budget and time allow.
When you’re ready to make the appliance swap, the compact appliance guides on NestKitchenMeals are a practical next stop. They’re built around real counter-footprint dimensions and what each appliance replaces, which makes it straightforward to pick the right size for your actual kitchen rather than the largest one that fits a recipe. Pick the right size for your actual counter, not just the recipe, and every inch starts working for you.
Frequently asked questions
How do I organize a tiny kitchen with no counter space if I’m renting?
Focus on no-drill and removable solutions: over-sink cutting boards, over-the-door organizers, tension-rod shelving, and rolling carts. None of these require permanent wall changes, and all of them can move with you when you leave.
What is the single fastest way to get more counter space in a small kitchen?
An over-sink cutting board. It converts dead sink space into a usable prep surface in minutes, costs $30 to $50, and requires no installation whatsoever.
Are rolling carts worth it for tiny kitchens?
Yes, especially models with locking casters and open shelving underneath. A compact cart adds both prep surface and storage in one footprint, and it moves out of the way when you don’t need it. Look for footprints around 12 by 16 inches to keep the cart manageable in tight spaces.
What small kitchen storage ideas work best without drilling into walls?
Tension-rod shelf systems, over-the-door organizers, adhesive rail strips for lightweight tools, and magnetic knife bars on smooth tile or surfaces are all strong no-drill options. For heavier items, tension systems are more reliable than adhesive, some are rated up to 66 pounds.
How do I decide which appliances to replace in a tiny kitchen?
Measure the footprint of everything currently on your counter, then identify which appliances do only one job. A multi-cooker and a toaster-oven-air-fryer combo are typically the two swaps that recover the most space, consolidating four to six single-use appliances into two units.